
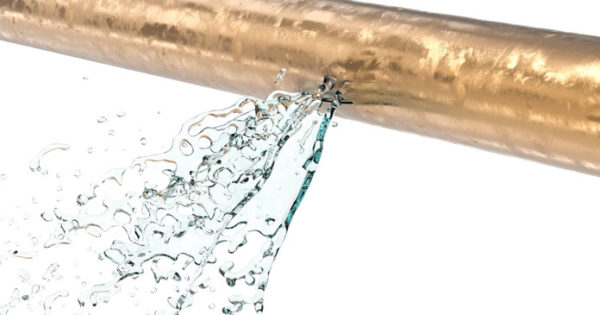
With winter firmly installed, every province in the country has experienced freezing temperatures well below normals. This happens and shouldn’t come as a surprise to anyone living in the great white north. Every year, we will all at one time or another experience temperatures that can freeze your face in minutes, and freeze your plumbing too. Here’s a look at getting prepared to fix leaks caused by frozen pipes.
There are three main types of water supply pipes used in residential plumbing: Copper, CPVC, and PEX. Each one has it’s own set of tools and skill sets to work with them. When water freezes inside these pipes, the expansion that occures quite easily cracks the pipes and causes leaks. Plumbers can easily cost hundreds of dollars, with prices raising drastically for off hours emergency calls. Here is a look at what you will need to get these leaks fixed on your own.
Copper
Copper pipes are popular in most residences. It was at once cheap to use and durable. Over the past few years, other options have become more popular, buy there is still a lot of copper pipes out there. Unfortunately, copper is the most difficult to work with, requiring soldering skills and a fuel supply to run a torch for heating up the connections. This can get tricky, and down right dangerous in confined spaces.
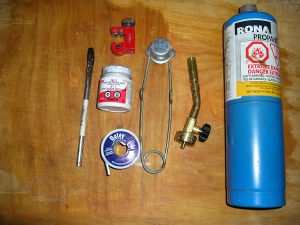
The tools – in order to make copperpipe repairs, you will need the following.
- Propane torch & a supply of 1lb propane tanks
- Lighter, matches or torch sparker
- pipe cutter
- soldering flux & brush
- Solder
- Sandpaper
Copper pipes are joined by sanding the ends clean, applying a caustic flux (thus the flux brush) to each piece and dry fitting them together (fittings are made to fit over the pipe). Once in place, the joint is heated with a propane torch and solder is then applied to the joint. If the joint was properly heated, the solder will melt and get drawn into the joint. It’s a bit tricky, and is a skill worth practicing. Keep in mind that whatever line you are working on, it needs to be open. For instance, if you have a leaak in the cold watter supply to the kitchen sinkk, make sure you open the cold water faucet. Heating a closed line will cause presssure to build up and further damage the plubming, sometimes in a sudden and explosive way!
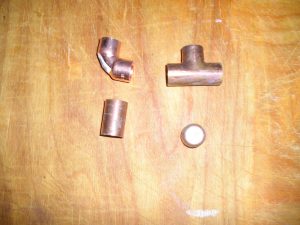
Fittings – a supply of fittings as well as a length of copper pipe (normally 1/2 inch) should be kept on hand. Copper pipe usually comes in ten foot lengths, but some hardware stores may sell shorter pieces. In addition, I recommend keeping the following:
- 2 X T connectorss
- 3 X 90deg. elbows
- 3 X 45deg. elbows
- 6 x Joiners
CPVC
CPVC was popular for a very short time. In my experience, it seems to be the type most easily damaged by freezing and can become brittle to work with in cold temperatures. Thankfully though, it is much easier to work with than copper.
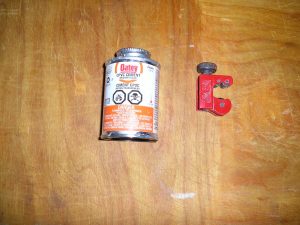
The Tools – In order to repair CPVC pipes you will need the following:
- Pipe cutter
- Sandpaper
- CPVC Cement
CPVC pipes are repaired by sanding both sides of the joint clean and dry fitting them together. Once ready, CPVC cement is applied to each end of the joint and the pieces quickly fit together with a push/twist motion. CPVC cement is quick to set and absolutely unforgiving. Fit your joints fast or you’ll be cutting it out and starting over. CPVC cemnt is also messy and drips everywhere, not to mention it stinks and is highly flamable in it’s liquid form. Don’t smoke while you do this and be prepared for cement dripping all over the place.
Fittings – A supply of fittings as well as a length of CPVC pipe (normally 1/2 inch) should be kept on hand at all times. Fittings normally fit over the pipe, but other configurations such as male to female connectors are available. CPVC pipe usually comes in ten foot lengths, but some hardware stores may sell shorter pieces. In addition, I recommend keeping the following:
- 2 X T connectors
- 3 X 90deg. elbows
- 3 X 45deg. elbows
- 6 X Joiners

PEX
Pex is a flexible plastic pipe and is currently the most popular type of plumbing being installed today. Easy to work with with very few skills or experience, it is my preferred type and I currently convert to it any time I can when repairs are needed.
The tools – in order to repair PEX pipe you will need the following:
- PEX Tubing Cutter
- PEX Ring Crimper
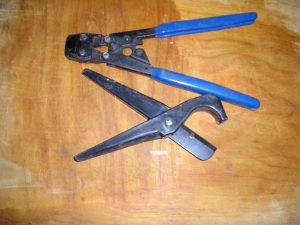
PEX pipes are repaired by placing a metal ring over the pipe, inserting the connector into the pipe and crimping the ring tight. The crimper takes all the guesswork out of the equation by releasing only when the ring has been properly crimped. PEX is the only style of plumbing where the connectors always fit into the pipe. There are two types of rings, each with it’s own crimper tool. Which ever you choose, make sure you get the right combination.
Fittings – A supply of fittings as well as a roll of PEX pipe (normally 1/2 inch sold in 50 or 100 foot rolls) should be kept on hand at all times. In addition, I recommend keeping the following:
- 2 X T connectors
- 3 X 90deg. elbows
- 6 X Joiners
- 50 X Metal rings
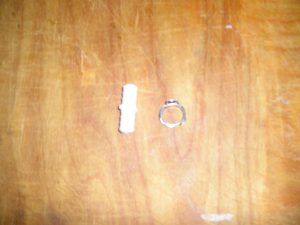
You may notice that I have omitted the 45deg. elbows in that list. PEX pipe is fairly plexible and 45 deg. bends can usually be achieved by flexing the pipe. Also, missing from the above photo are T connectors and elbows. This is because I used them up in a recent repair from frozen pipes. I will replenish my stock on the next trip to the hardware store. Keep your supplies stocked up so you have them when you need them.
WARNING – AVOID THESE AT ALL COSTS!!!
When you need to transition from copper or CPVC to PEX, always get a solder on transition connector for copper to PEX and cement on transition connectors for CPVC to PEX. Some hardware stores will try to sell you push on connectors that are supposed to accept any of these three types. DO NOT FALL FOR IT. Thes connectors not only cost more ($4.00 and up compared to $.50 – $1.00) but they are very difficult to work with. A lot of manual pressure must be used to properly connect them to pipes and it must go in perfectly straight. Trust me, these connectors will cost you more money and a lot of frustration. Sure, they sell a little tool that is supposed to release them, but it rarely works.

ADDITIONAL TOOLS
In addition the the specific tools mentioned above, you may also want to consider having the following on hand just in case.
- Channel lock pliers for holding hot copper
- Rags, dampened for cooling or manipulating hot copper
- Hammer for VERY gently tapping fittings onto pipes
- Respirator mask in case the smell of CPVC cement bothers you or you work with it in a confined space
ADDITIONAL FITTINGS
In addition to the fittings listed, you may want to have the following on hand in all types.
- Caps for capping off a pipe if you need to get to the repair at a later time
- Type to type unions for joining dissimilar types of pipes
- Shutoff valves, sometimes they wear out and they are always handy for allowing partial shut offs of your water supply
- Washing machine and dishwasher hose connectors