Prep-budget doesn’t mean skipping essentials. You can build meaningful resilience by picking up low-cost but high-utility items—tools that cost little but deliver value when things don’t go to plan. As one prepper put it:
“For shelf stable, ready to eat food look at Indian meals at the local area Indian grocery store. Much cheaper than backpacking meals.” Reddit+2new-terra-natural-food.com+2
Here are ten such items, together with why they’re useful, what to look for, and example products.
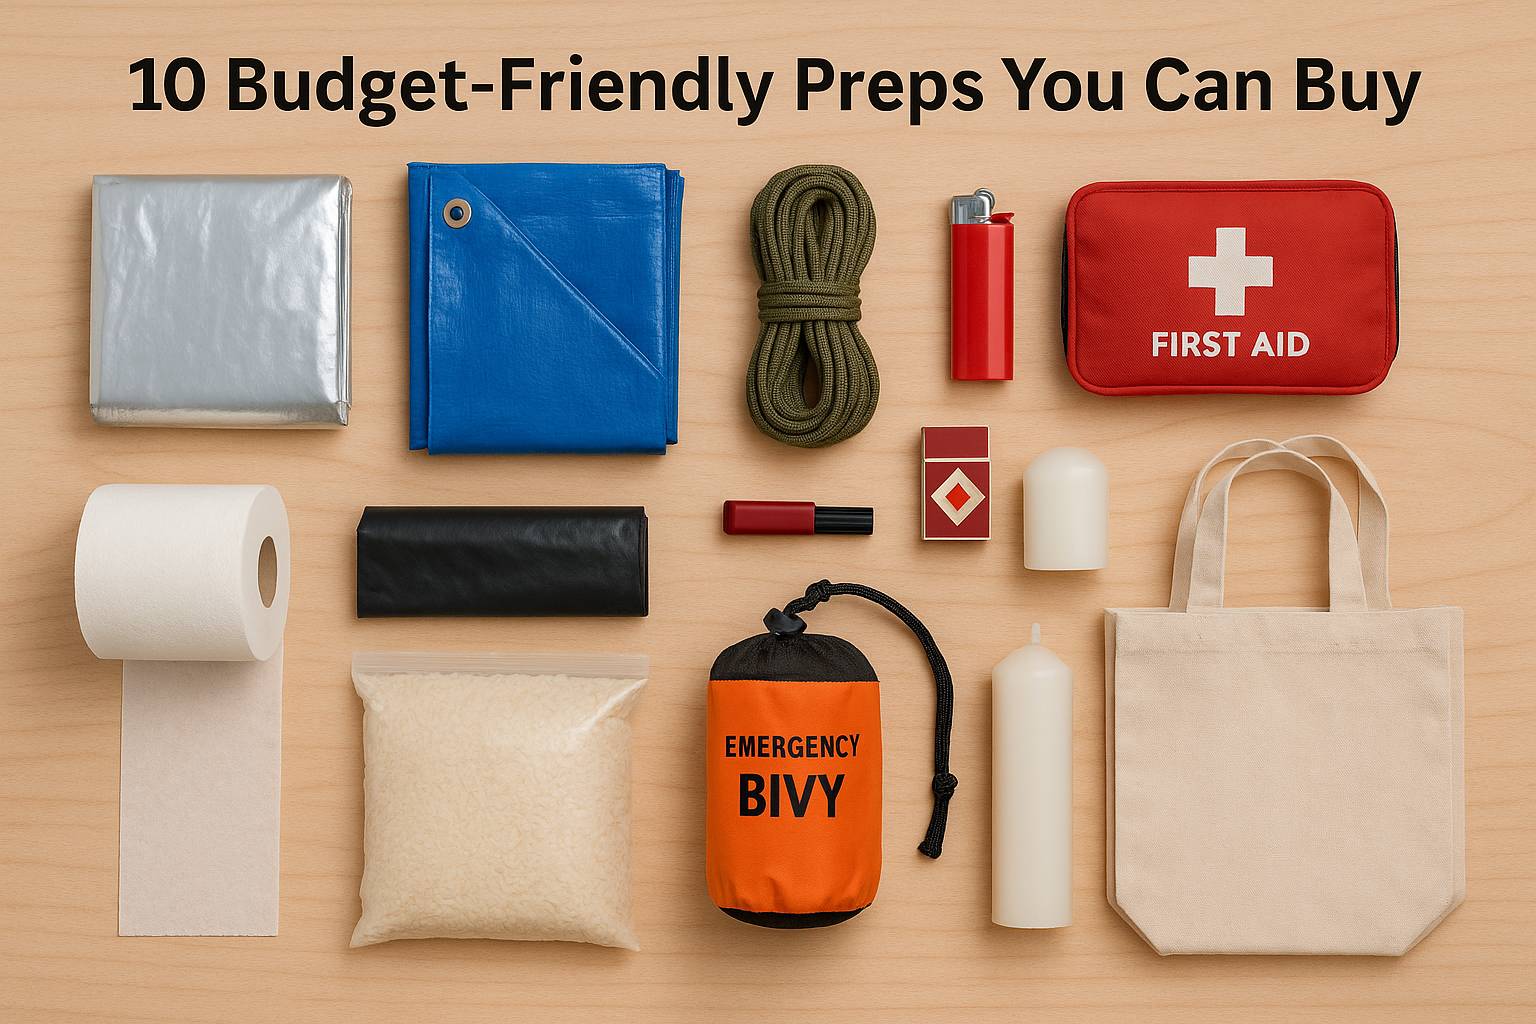
1. Emergency/Reflective Blanket
When the grid goes down, you can’t assume heating, full shelter or perfect insulation. A reflective emergency blanket offers heat-retention and can serve as a makeshift shelter liner or ground cover.

- Why it’s cheap & high-value: Very low cost, minimal bulk, widely available.
- What to look for: Mylar or thermal-foil material, size adequate for one person, durable packaging.
- Example product: Adventure Medical Kits SOL Survival Blanket – affordable, compact.
- Tip: Store one per person (including children), keep in glove-box or bug-out bag.
2. Tarps / Multipurpose Shelter Sheet
A tarp is one of the most versatile items for preppers: you can use it for ground cover, shelter roof, wind break, rain catch, extra protection. Budget-friendly tarps let you pick up useful redundancy without big cost.
- Why it’s cheap: Tarps are common hardware items, cost-effective.
- What to look for: Durable material (polyethylene or heavy-duty “all-weather”), grommets, size large enough (e.g., 8×10 ft or more).
- Tip: Combine with paracord/rope (see #3) and you’ve got basic emergency shelter gear.
3. Paracord / Twine
Thin rope/thick twine is ridiculously useful for shelter building, lashing loads, hanging gear, fixing things. A small investment, big return.
- Why it’s cheap: Simple item, high utility.
- What to look for: 550-cord strength (or equivalent), preferably weather-resistant, minimum length.
- Tip: Stock a 50-100 ft length; keep some in your car, some in your retreat kit.
4. Matches & Lighter + Tinder
Fire building remains one of the most underrated prepping tasks (warmth, cooking, signalling). A pack of waterproof matches or a reliable lighter (plus proper tinder) is a low-cost but foundational prep. Canadian Preparedness+1
- Why cheap: Basic fire starters cost very little.
- What to look for: Waterproof packaging, wind-proof/match-case if possible, backup lighter.
- Tip: Store in waterproof container; rotate periodically if stored long-term.
5. Basic First Aid Kit + Personal Hygiene Items
Emergencies often stress the mundane: cuts, blisters, hygiene. A low-cost first-aid kit plus extra soap, toothbrush, floss, feminine items (if applicable) helps cover “normal‐becomes‐critical” events. Attainable Sustainable®+1
- Why cheap: You can start small, then upgrade later.
- What to look for: Bandages, antiseptic wipes, pain-relief (NSAIDs/acetaminophen), personal meds, hygiene items.
- Tip: Keep one kit at home, one in car/bug-out bag.
6. Toilet Paper + Trash Bags + Hygiene Supplies
Often overlooked: sanitation becomes a big problem when water, sewers or supplies are disrupted. Even simple trash bags, toilet paper and wet wipes count as preps. Attainable Sustainable®
- Why cheap: These are regular-store items and cheap per unit.
- What to look for: Large trash bags, extra rolls of toilet paper, wet wipes, maybe portable “bucket toilet” setup.
- Tip: Choose unscented/traditional variations (less risk of adverse reactions if stress). Rotate simply.
7. Dry Goods / Staples (rice, beans, pasta)
Food prepping doesn’t necessarily mean expensive freeze-dried meals. Bulk staples like rice, beans, lentils, pasta offer calories and storage life on a budget. new-terra-natural-food.com
- Why cheap: These items are everyday grocery items; you don’t pay “premium survival kit” markup.
- What to look for: Look for large bags, store in dry, cool place, label with date.
- Tip: Buy something you already like eating—makes rotation easier (“first in, first out”).
8. Emergency Candles + Multi-Purpose Lighting
When power goes out, lighting matters—for comfort and safety (trip hazards, signalling, etc.). Candles and basic lighting gear are low cost. Canadian Preparedness
- Why cheap: Basic candles cost little; you don’t need high-end lanterns initially.
- What to look for: Unscented candles, metal containers, long burn time; maybe glow-sticks for quick visibility.
- Tip: Store with matches/fire starter and keep in accessible location.
9. Market Bags / Mesh Bags / Reusable Shopping Bags
Seems mundane—but small multi-purpose items like mesh bags can help harvest wild foods, transport supplies, act as backup water bags, etc. According to prepping checklists: cheap items matter. Canadian Preparedness
- Why cheap: Easily sourced at grocery stores or discount shops.
- What to look for: Durable re-usable bags, preferably washable/mesh.
- Tip: Keep a few in your vehicle and retreat supply.
10. Emergency Shelter Sheet / Bivy / Lightweight Survival Tent
For very low cost you can pick up an emergency shelter sheet or bivy tent sized for 1-2 people. Good for “bug-out” or temporary shelter support without spending hundreds of dollars.
- Why cheap: Entry-level shelter items are inexpensive compared to full tents/backpacks.
- What to look for: Lightweight, weather-resistant, compact pack size.
- Example product: Life Tent Emergency Survival Shelter 2 Person Bivy Tent – budget-entry shelter solution.
- Tip: When buying, check pack size (small is better), and practice setting it up once before you need it.
How to Use This & Prioritise
Given your budget and timeframe, here’s how you might proceed:
- Start with the “must-haves”: Items that cover basic survival needs (shelter, fire, food, water, hygiene). From above, I’d say #1, #2, #4, #7 are top priority.
- Buy incrementally: As shared by budget prepping guides, you don’t need everything at once. A few dollars per week/month adds up. Mountain House+1
- Choose what you already use: Especially with food and hygiene, buy items you and your family already consume so it gets used rather than wasted. new-terra-natural-food.com+1
- Rotate & test: Buying is only half of it. Practice using your items: try the tarp, set up the bivy, test your fire starter in a safe environment, train your household.
- Watch for deals: Prepping on a budget means being alert to sales, discount items, even repurposing everyday items for survival use.
Canadian-Specific Notes & Pricing Reality
- In Canada (especially in outlying/remote areas like central Ontario or Québec), shipping and seasonal pricing matter—so buying early when discounts occur is smart.
- Items like tarps, trash bags, mesh bags are often cheaper locally at hardware/discount stores rather than speciality “survival” retailers (which may carry higher markup).
- Consider “Canadian” versions of these products (for metric sizes, packaging, language) or use U.S. retailers with Canada shipping if cost-effective.
- Storage conditions matter: price alone doesn’t make a good prep; consider shelf-life, packaging, climate (humid Québec basement vs heated garage).
- Leverage local community shopping: if you already bulk-buy beans, rice, etc with a group, you can reduce per-unit cost and share storage.
Final Thoughts
Prepping isn’t about going broke but about smart allocation of your dollars to items that offer the most return in stress/mess-up situations. The ten items above form a strong foundation of “low-cost, high-utility”. Once you’ve covered those, you can scale up to more expensive gear (long-term food buckets, multi-fuel stoves, large water filtration systems) but you’ll have the core covered.