WVSanta, of the West Virginia Preppers Network, is back with Part 4 of his much-anticipated series on Emergency Communications!!! We here at the CPN are glad and proud to host WVSanta’s Emergency Communications series as these posts have generated much interest among the preppers networks! For those of you not already aware – WVSanta is heading up the American Preppers Network Communications Committee on the American Preppers Network Public Forum! WVSanta has a huge role to fill on this network in trying to establish alternative methods of communication for the entire network – but he has big shoulders and we know that he can carry this task out to fruition.
For those of you not familiar with WVSanta’s Emergency Communications series…I recommend that you start at the beginning….read Emergency Communications Part 1 here, Part 2 here and finally, Part 3 here. And once you have caught up on the series, come back and read Part 4.
Now enough of my rambling and on to the latest Emergency Communications post!!!
—–
Emergency Communications – Part 4
In this part of the series, I am going to cover the process of putting up a wire antenna. This process can be done with different types of equipment and materials. I will also cover different techniques that I did not use but most people do. I did this at the spur of the moment because I happened to have the time and the help to get these antennas up. The demonstration is of my 160 meter antenna which is the longest and heaviest of all my wire antennas and my home brew 80 meter wire. I also used what material I just happened to have on hand that would work.
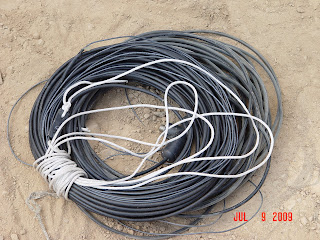
The first picture is of the wire antenna coiled up before being stretched out so you can see how portable this can be even though it is the longest wire I have. It is cut for the 160 meter band but with the use of a good antenna tuner it can be used on other bands.
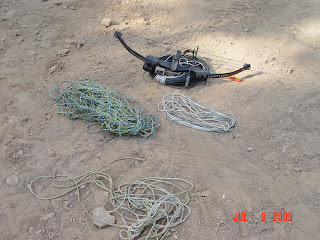
The next picture is what we used to get the antenna put up with. What we have is rope of different types a bow and arrows and a fishing rod strung with 30# test line.
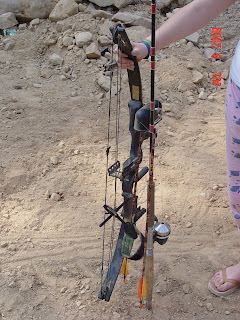
Next a close up of the bow and the fishing rod with the arrow attached to the fishing line and the rod used.
Close up of how we attach the fishing line to the arrow.
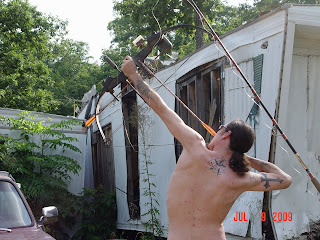
Next is a picture of my son shooting the first line into the tree. Next to him is the fishing rod with the line released for the shot. We tie the line to a practice tip on the arrow. The trailer in the background is used to store all my junk, ugly but it was free and will eventually be demolished when the garage and shop get built. (That will be another post coming up showing how to use trees from your property to make lumber to build with). Also some of that tattoo work on my son is done by me. (One of my other hobbies).
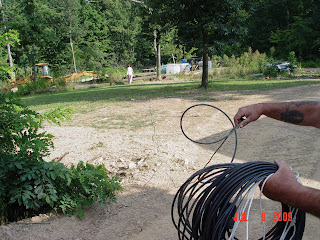
Next is me and my daughter stretching the antenna out and laying it on the ground in the area it will end up being raised from. In the background is the trees taken down for making lumber with. The cleared area was all woods at one time and that is the reason the antennas were taken down before last winter. Yes some of my tattoos were also done by me during times when I get bored during the winter months.
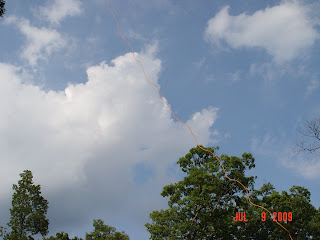
I used RG6 coax cable to raise this one with. (The orange wire in the picture below) Why you ask? Well the main reason is it was free. It was a 1000 foot roll that had got tangled. Since it was laying there I just decided to use it to save on rope for use on other antennas.
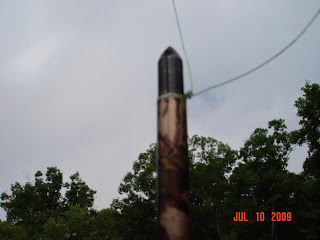
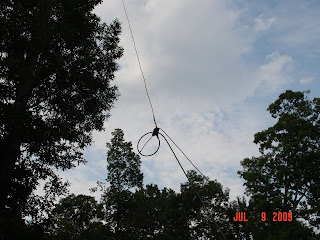
Next is us raising the center of the antenna up in the tree The loop you see in the picture is the feed line to the antenna tied back to the center as a strain relief. The other wire going up will hold the center of the antenna up in the tree. The other ends are tied to trees on the far end of the wire lower to the ground so the wire ends up in an inverted V shape. The reason I put them up this way is they are not as directional as a wire put up flat top or with the ends at the same elevation as the middle. This gives you better performance in a 360 degree radius.
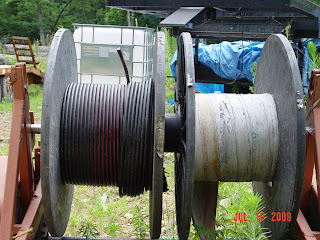
Next is the home brew 80 meter antenna. This antenna was made from ½ inch hard line coax cable that was left over on a project of building aerial lines for a cable TV system. This picture is of a spool of this cable that would have otherwise been cut up and put into dumpsters. I did this type of work for several years and brought these spools home since they were being thrown away anyway. As you can see all of one spool has been used and the 80 meter antenna showed next was made from that wire. The one with wire still on it has enough to make several more antennas.
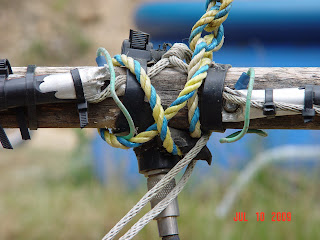
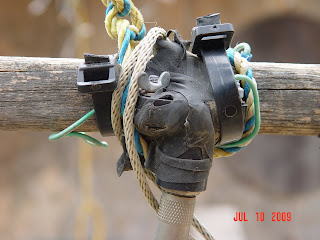
Now I will show you some close ups of the feed point of the antenna. Let me tell you this started as an experiment and worked so well I am keeping it just the way it is. This all happened like everything with me a couple of people getting together and building this with stuff just lying around. This will be real funny to some and look like pure junk to others but that is OK because it was all free and it WORKS so don’t knock it.
Now unlike the other antenna this is NOT PORTABLE it is very heavy and very stiff to work with. My antenna GURU friend talked me into doing this with the idea that the increased surface area of the large shield on the outside of this coax would work very well. After building this one Sunday and getting on the air we found his theory was indeed correct. With the first signal report we got people could not believe I was not running a big amplifier. We were using my Kenwood 570D with the antenna feed line running directly to the radio.
I was told the next day he was in the local candy store (Ham Radio Store) and people there were talking about it. He ended up telling them that he was indeed here during the test and they still insisted there had to be more than just the radios wattage being used. He is pretty well known for being really good with antennas and they wanted drawings of this antenna. He later told me that he would not do it. So they raised the stakes to a free 80 meter Double Bazooka antenna for a drawing. By the way that is the type of antenna in the first set of pictures except that one is for 160 meter not 80 meter. (Twice as long as 80 meter). Anyway he did finally draw it for them but they still questioned the wattage being used. As I say his reputation is very good and he did get the free antenna. For all you experienced Hams out there get ready for a good laugh but IT WORKS and that is all that matters!!!!!!!
The first picture is simply a connector my buddy had that is a SO239 connector wired to two studs with wing nuts in a plastic case. One of the wing nuts is connected to one side of the hard line by the green wire and the other wing nut goes to the second section of coax. (Picture 2) The piece of wood is a broken axe handle that just happened to be lying around the day we built this monster antenna. Well it may be ugly but it works and it was free so what can I say.
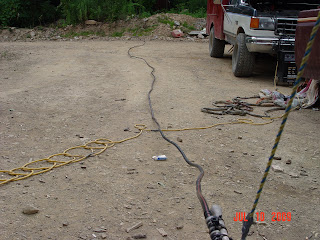
This next picture will show you how long this antenna is. The math for this antenna worked out to be 70 some feet but after trimming for SWR it ended up being 68’6” on one leg and 67’4” on the second leg. The way I was told the technical name for this antenna is an OFF CENTER FEED DIPOLE. Because it is off center feed it works well with 50 ohms feed line instead of ladder line.
Well there you have a little bit of how things work with building antennas and putting them up in trees. One of the best things about Ham radio is the fun of making things work. Sometimes you just have to try things and see if it works.
There are many different ways to put these wire antennas up but for this article I tried to show some of the many different ways you can make things work with what you happen to have on hand. One point I would like to make is that a much more permanent way to install wire in trees is thru the use of using pulleys with the rope run thru that and held down with sand bags tied to the rope on the ends. This method allows the rope to glide up and down without to much force being applied to the wire when the wind blows. The other thing is it is best to use regular antenna rope that is UV resistant when installing wire antennas.
Again my purpose with this article was to show that you can use just about anything you have on hand if you must to make things work if you end up in a pinch. We may need to use whatever we have in a SHTF situation. Also remember that here I have showed you 2 really big antennas and 1 that is in no way typical at all. But it all works and really I will be redoing these properly with pulleys and sandbags as time allows. With the exception of my 80 meter ugly duckling antenna, I will let it be the way it is until it no longer works. HI HI….
73 all W4DMH
God Bless from the Wild and Wonderful West Virginia
Santa
—–
Again – our thanks to WVSanta for always being so willing to share his experience and knowledge in emergency communications with the preppers networks! And if any of you have any questions for WVSanta…leave a comment here or contact WVSanta at WVSantaclaus@aol.com.
And don’t forget to check out WVSanta’s posts on the West Virginia Preppers Network!
(I really enjoy his posts on West Virginia Fun Facts!)
Thanks WVSanta!!!

