
Home canning is one of my favorite ways to preserve the garden harvest. Since I don’t have a root cellar (yet), most everything that would go into cold storage can be home canned, however, it doesn’t end there. Every year berries are turned to jam, harder fruits are preserved for winter desserts, and vegetables and meats are canned for mealtimes. In addition, some prepared foods like pasta sauce, chili, and various hearty soups and stews are put up in the pantry.
Home canning can be divided into three skill levels…Basic, Intermediate, and Advanced. Here, along with a quick guide to getting set up, I’ll go over how you can get started in home canning.
Getting Started
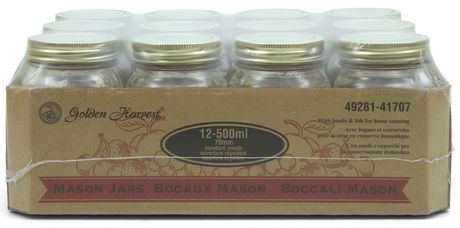
There is some basic equipment you will need to get started. Obviously, canning jars will be high on the list. ONLY use jars that were made for home canning. Most jars that you buy foodstuffs in at the supermarket simply aren’t made to be reused as the seal on the lid is a one time use only material. Canning jars come with a two piece lid, where the part with the seal on it can be inexpensively replaced. Ball and Mason are two well known brands of canning jars that have been around for decades, recently however, a new brand called Golden Harvest has made inroads to the market. These jars are made a little thinner than the older brands, but I have used many of them and not noticed a higher failure rate than any other brand.
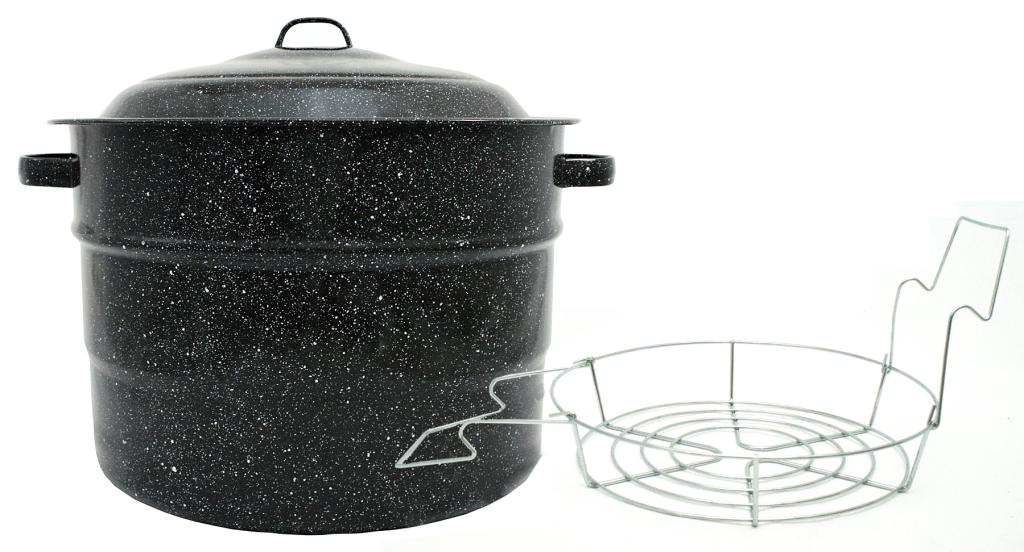
A canner will be the next item for purchase, and deserves a bit of consideration. For water bath canning (I’ll explain the different methods as I go along) these are usually a large enameled steel pot with a rack in the bottom to keep jars on while processing. These canners are used for high acide foods such as tomatoes and fruit only. Do not use these for canning vegetables or meats.
When you get to an intermediate level, you will want to be canning up low acid foods such as vegetables, meats, and even homemade recipes like soups and stews. For this you need a pressure canner. Pressure canners compensate for the lower acid levels of foods by raising the water temperature from that of a water bath canner (212F) to a higher temperature (240-250F). If you are interested in canning, you have probably heard a horror story or two about how Grandma’s canner exploded…these stories are greatly exagerated. Although a completely abused pressure canner might fail in this way, today’s canners have many safety features that would prevent this from happening.

There are two major brands available when shopping for a pressure canner. First we have the Presto brand. These are aluminum canners that use a weight to maintain pressure, a gauge to get the pressure precise, and a rubber seal under the lid to prevent loss of steam. This gasket will need to be replaced every few years as the do break down and begin to leak. These are great canners for the beginner, as they are quite affordable…usually in the $150.00 range and available from Home Hardware.

Another brand has become popular among preppers…the All American. These canners are made to last! If you want something your great grandchildren could be using, this is the one to get. There is no rubber seal to break down as they use a steel on steel seal between the canner and the lid. The regulator weight is also adjustable for 5, 10, and 15 lbs. There is a cost difference however, with an All American in a comparable size to the Presto unit above selling for around $400.00. I recommend checking out Briden Solutions for one…just because they are such great people to deal with and offer free shipping on orders of $200 or more.

A canning tool kit will be your best friend for either water bath or pressure canning. The basic tool kit will include a funnel made to fit regular canning jars, a jar lifter to get hot jars out of the canner, a lid lifter for picking up hot lids, and a scraper/headspace gauge. Don’t skimp out on this as it will make home canning so much easier…they usually cost about $15.00.
One more thing you will need is a guide…one that is much more detailed than I could ever hope to publish. I recommend the USDA Complete Guide to Home Canning. I have it and have fondly called it my canning bible. This guide will give you a great overview of how home canning preserves food, the basic steps to be followed, and most importantly, the processing times of various foods. The bonus is that it is completely free to download. I recommend downloading it, printing it, and putting it in a binder for future reference. DO NOT CAN ANYTHING without this guide.

Basic Canning
For the beginner, I would recommend starting with water bath canning. Not only will the be the most economic way to get started, but it’s a great way to practice and develop the basic skills required. Water bath canning is reserved for high acid foods such as fruits,pickles, and tomatoes. These foods rely on the acidity within them to help kill bacteria, which allows them to be safely canned at the lower temperatures (212F) of boiling water. The first chapter of the USDA Guide will introduce you to the important methods of sterilizing jars, preparing lids, and other food safety tips, so I won’t go into all of this here. Get a good canning season under you belt before venturing into more advanced methods.
Intermediate Canning
Now that you have a good grasp of how to can your own foods in a water bath canner, you can confidently move into pressure canning. Again, you should always follow recipes and directions in your guide to the letter. By pressurizing water, pressure canners create a higher temperature (240 – 250F) than the water bath canners, allowing foods lacking in acidity to be safely preserved. With a pressure canner you can home can all sorts of fresh vegetables, meats, seafoods and more.
Advanced Canning
Although I do this for my family, I do not accept any resposibility for anything that may happen if you do decide to try this.
Once you have a good grasp of pressure vanning, you may want to try deviating from the guides and trying your own recipes. It really is easier than it sounds, and if you follow the basics, there should be no problems. You’ve likely seen recipes in the guide for pasta sauces, soups, stews and other combination foods, but some of them seem bland, or just not to your liking. Despite official advice, you can preserve your own recipes if you follow one basic principal.
Make a list of the main ingredients in your recipe. Take note of the processing times and always process your food at the LONGEST time.
Before You Eat
Always check your home canned food before eating. Check for a good seal before you open the can and make sure you hear that sucking sound of air rushing into the jar when you remove the lid.
Look at and smell the contents. If the food is severely discolored or has a foul odor, discard it.
No matter what guide or advice you follow, you, and you alone, are responsible for the quality and safety of the food you preserve and eat. If in doubt, throw it out.