A durable bush base for hunting, gathering and travel after the grid goes down
A hastily pitched tarp can get you through an unexpected night in the bush. It will not support repeated hunting trips, resource gathering, trade runs or travel between distant communities.
After a prolonged collapse, people may need to spend days away from their primary homestead. Game trails must be checked, traplines maintained, firewood gathered and distant sources of food or medicine visited. Attempting every journey in a single day wastes energy and encourages dangerous decisions as darkness approaches.
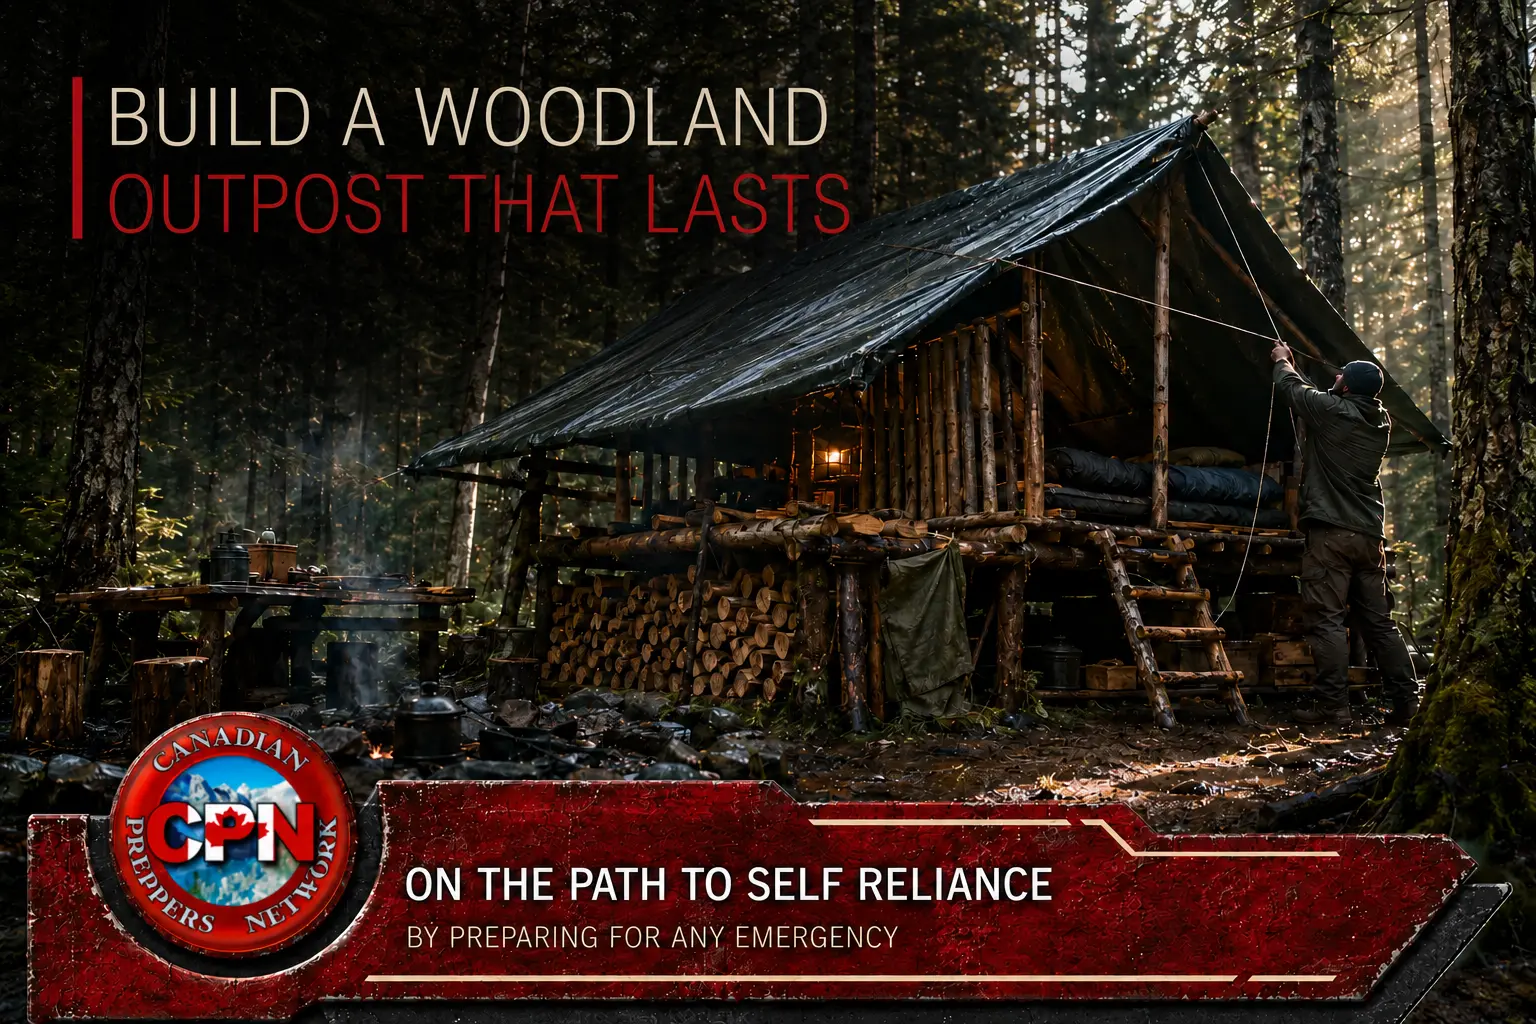
A woodland outpost provides another option. It is not a second homestead and does not need to resemble a log cabin. It is a small, durable base positioned where it shortens important journeys and gives travellers a dependable place to rest, dry clothing, prepare food and wait out bad weather.
The best outpost begins simply and improves each time it is used.
Choose the Site Carefully
A convenient location is not necessarily a safe one. Low ground may be close to water, but it can also collect cold air, insects and floodwater. An exposed ridge provides visibility but may be battered by wind. Dense conifers offer shelter until dead branches begin falling during a storm.
Before building anything, examine the area rather than immediately clearing it.
Look for gently elevated ground with natural drainage. The site should be close enough to water that collecting it is practical, but far enough away to avoid flooding, damp soil and concentrated animal activity. A moderate slope is acceptable if a level sleeping area can be established without extensive excavation.
Inspect every tree that could reach the camp if it fell. Dead standing trees, split trunks, suspended branches and trees leaning heavily toward the shelter are serious hazards. This is particularly important after windstorms, heavy snow or freezing rain.
Also consider how the site fits into the wider landscape. A useful outpost might sit near:
- A productive hunting or gathering area
- A long route between settlements
- A woodlot being managed for fuel
- A dependable water source
- A fishing lake or navigable river
- A distant pasture, sugar bush or trapline
- A junction between several established trails
The outpost should solve a recurring travel problem. Building one simply because a spot looks pleasant can consume valuable time and materials without providing much benefit.
PLINKIN’ IN THE WOODS
With Frugal Gunnie
Spend a full day developing practical outdoor marksmanship skills with Frugal Gunnie. This is a hands-on private event—not another afternoon spent sitting at a shooting bench.
Saturday, September 12, 2026
8:00 a.m.–5:00 p.m.
Great Ape Empire
267 Highway 6, Wiarton, Ontario
Weekend camping: $20 per person
Space is strictly limited. Adult participants must meet all applicable legal and organizer requirements.
|
VIEW EVENT DETAILS |
Presented in collaboration with Off-Grid School, Preppers Meet,
Canadian Preppers Network and Great Ape Empire
Start With a Raised Sleeping Platform
A dependable sleeping area is the heart of the outpost. Without one, every visit begins with clearing stones, levelling ground and finding dry bedding.
A low platform can be made from two parallel support logs with smaller poles laid across them. It need only be high enough to separate the occupant from wet soil, insects and surface runoff. Cover the poles with evergreen boughs, dry grass, woven mats or a carried sleeping pad.
The surface should be level and long enough to prevent feet and bedding from hanging over the edge. Smooth or trim sharp knots before placing a tarp, blanket or sleeping bag on top.
If building materials are limited, construct one narrow sleeping platform first. A second can be added later. The space underneath can eventually become dry storage for firewood or equipment, provided food is not kept where rodents can reach it.
A raised platform also makes the shelter easier to maintain. Bedding can be removed, shaken out and dried rather than gradually becoming part of the forest floor.
Build the Roof Before the Walls
The first purpose of a shelter is to keep its occupants and supplies dry. Walls provide warmth and wind protection, but a poorly designed roof can make the entire structure useless.
A heavy-duty tarp stretched over a ridgepole is the quickest starting point. Give it a steep enough pitch to shed rain and snow rather than allowing water to collect in the centre. The tarp should extend beyond the sleeping platform so runoff lands outside the occupied area.
Avoid allowing cordage or ridgelines to guide water into the shelter. Small drip lines tied near the ends can cause water to fall before it reaches the protected space.
Over time, the tarp can be supported by a more permanent pole frame. A second layer of poles, bark or local debris may protect it from falling branches and ultraviolet damage, but do not pile heavy material directly onto a tarp that was not designed to carry the load.
Walls should be added where they provide the greatest benefit. Begin with the prevailing-wind side and the end most exposed to blowing rain. A partial front wall can create a protected sleeping area while leaving ventilation and working space.
Do not seal the shelter completely. Condensation from breathing, wet clothing and cooking can soak bedding almost as thoroughly as rain.
Canadian Grid-Down Starter Kit
Use this printable first-72-hours checklist to test your household’s water, power, food, sanitation, communications and operating routines before a short outage becomes a long-term grid-down emergency.
Control Drainage Before It Becomes a Problem
Water will eventually reveal every weakness in a campsite.
Watch the site during rain if possible. Natural runoff may pass directly through the shelter even when the ground appeared dry during construction. Correct small problems early by moving loose debris, reshaping the immediate surface or raising equipment.
Avoid digging a deep trench around the shelter. Trenches require maintenance, create tripping hazards and can cause erosion. A shallow diversion channel on the uphill side may be useful when runoff cannot be controlled another way, but the excavated soil should not be piled against wooden supports.
Frequently used paths also affect drainage. Repeated foot traffic compacts soil and creates depressions that collect water. Place flat stones, split logs or short sections of corduroy trail in persistently muddy areas.
Separate Sleeping, Cooking and Sanitation Areas
A tiny camp quickly becomes unhealthy when every activity occurs in the same few square metres.
The cooking area should be close enough to use during bad weather but separated from bedding, fuel and the main shelter. Sparks, spilled grease and unattended coals can destroy an outpost that took weeks to build.
Establish a consistent sanitation area downhill and well away from the shelter and water source. Store a small digging tool there rather than carrying it back and forth through camp. Soap, cleaning supplies and toilet materials should be protected from rain and animals.
Wastewater containing food particles should not be dumped beside the sleeping area. Even a small amount can attract insects, rodents and larger animals. Food scraps should be burned only when they can be completely consumed by a hot fire. Otherwise, they must be removed or managed well away from camp.
These divisions do not require signs or elaborate construction. They require consistent habits from everyone who uses the site.
Build a Safe Working Fire Area
A campfire is valuable for heat, cooking, drying clothing and morale, but it can also reveal poor site planning.
Clear the fire area down to mineral soil and keep it away from exposed roots, peat, dry grass and overhanging branches. In regions with deep organic soil, heat can travel underground and reappear later as a wildfire.
A simple reflector made from green logs or stones can direct some warmth toward a working or sitting area. Stones taken from wet shorelines should not be heated because trapped moisture can cause them to crack or burst.
The outpost should maintain three separate fuel supplies:
- Ready fuel kept under cover
- Larger wood seasoning for future visits
- Emergency kindling and tinder stored in a sealed container
Do not depend on finding dry tinder after arriving cold and wet. A small reserve of birch bark, dry shavings, resinous wood or commercial fire starters can turn a miserable arrival into a manageable one.
When leaving, extinguish the fire completely unless someone remains responsible for it. A durable outpost is useless if the surrounding woodland burns.
CPN Gold Membership
Gold Membership includes access to the CD3WD collection and hundreds of practical manuals covering food production, water, energy, repairs, health, agriculture and self-reliance.
Only $5 per year.
Store Supplies Against Moisture and Animals
Anything left at an outpost should be considered expendable. Weather, rodents, insects and other travellers may reach it before you return.
Useful cached items could include a cooking pot, basic hand tools, cordage, fire-starting materials, candles, cleaning supplies and limited emergency food. Supplies should be stored in sealed metal containers or heavy, rodent-resistant buckets raised above the ground.
Moisture is often the greater threat. Tools rust, matches absorb humidity, salt clumps and clothing develops mildew. Containers must be dry before being sealed. Small packets of desiccant can help, but they do not compensate for storing damp equipment.
Food storage deserves particular care. Odours can attract bears and smaller animals even when the container cannot be opened. Keep food away from the sleeping shelter and never leave grease-soaked cloths or cookware beside bedding.
Record what was left and when it was inspected. A cache that has not been checked for two years should not be assumed to contain usable supplies.
Add Improvements Over Several Visits
Trying to complete the entire outpost at once encourages shortcuts and exhaustion. Build in stages based on actual experience.
The first visit may establish only the location, sleeping platform and tarp roof. Later visits can add:
- A protected firewood rack
- Windbreaks and partial walls
- A stable cooking surface
- Tool hooks and drying poles
- A small workbench
- Improved trail drainage
- A second sleeping platform
- Seasonal insulation or insect screening
Experience will reveal which improvements matter. A wall planned on paper may block useful ventilation. A fire pit may need to move because smoke settles under the roof. A storage box may be secure from rain but perfectly positioned for mice.
Let the site teach you how it wants to be used.
Prepare It for Every Season
A summer shelter is not automatically a winter outpost.
Snow loading is one of the greatest seasonal concerns. A shallow roof may collect hundreds of kilograms of wet snow. Steeper roof angles, stronger supports and regular clearing reduce the danger, but any structure left unattended must be inspected before someone crawls beneath it.
Winter also changes access to water. A nearby stream may freeze or become difficult to reach. Melting snow consumes considerable fuel and produces less water than many people expect. A stored metal pot and additional firewood become especially important.
During spring, melting snow can flood ground that remained dry throughout summer and autumn. Insect pressure may make an otherwise excellent site nearly uninhabitable. By late summer, wildfire risk may restrict or eliminate open fires.
A serious outpost is planned around the worst likely season, not the pleasant weather experienced when it was built.
Preparedness Books, Clothing and CPN Merchandise
Visit the CPN Shop for preparedness books, CPN clothing and merchandise created for Canadians working toward greater self-reliance.
Keep a Maintenance Routine
Every arrival should begin with an inspection.
Check overhead branches, roof supports, cordage, animal damage, water intrusion and the condition of stored supplies. Examine the fire area before lighting anything. Shake out bedding and look for nests, insects or dampness.
Before leaving:
- Replace used firewood and tinder
- Dry and store tools
- Clean cookware
- Remove or secure food
- Repair roof damage
- Cover the sleeping platform
- Extinguish all flames and coals
- Record depleted supplies
This discipline transforms a rough camp into reliable infrastructure. The work done at departure determines how useful the outpost will be during the next arrival—possibly under far worse conditions.
Tools Worth Owning
A practical outpost kit should favour durable hand tools that can be sharpened, repaired and used without fuel or electricity.
- Folding pruning saws
- Compact forest axes and hatchets
- Fixed-blade utility knives
- Manual wood augers
- Heavy-duty camping tarps
- UV-resistant bank line
- Heavy leather work gloves
- Compact camp shovels
- Sharpening stones and files
- Rodent-resistant metal storage containers
- Stainless-steel cooking pots
- Waterproof fire-starting kits
Disclosure: This article contains Amazon affiliate links. As an Amazon Associate, Canadian Preppers Network may earn from qualifying purchases.
A Small Base With a Large Purpose
A woodland outpost does not need to be impressive. Its value comes from being dry, dependable and positioned where it makes difficult journeys safer.
Begin with a sound location, a raised bed and reliable overhead cover. Add drainage, firewood, storage and working areas as repeated visits reveal what is actually needed. Maintain it each time you pass through.
After the grid goes down, distance will feel greater than it does today. Roads may become impassable, vehicles may be unavailable and every journey will consume calories that cannot easily be replaced. A modest outpost can divide that distance into manageable stages—and provide a familiar place to recover before continuing into the bush.