Meat preservation is stronger when your reserve can survive without electricity.
The deer is butchered, the bulk beef order is packed away, and the freezer lid barely closes. It feels like food security.
Then the power goes out.
A generator can keep that meat frozen, provided the generator works, fuel remains available, and someone keeps the system running. During a prolonged breakdown, every additional week of frozen storage carries an ongoing obligation.
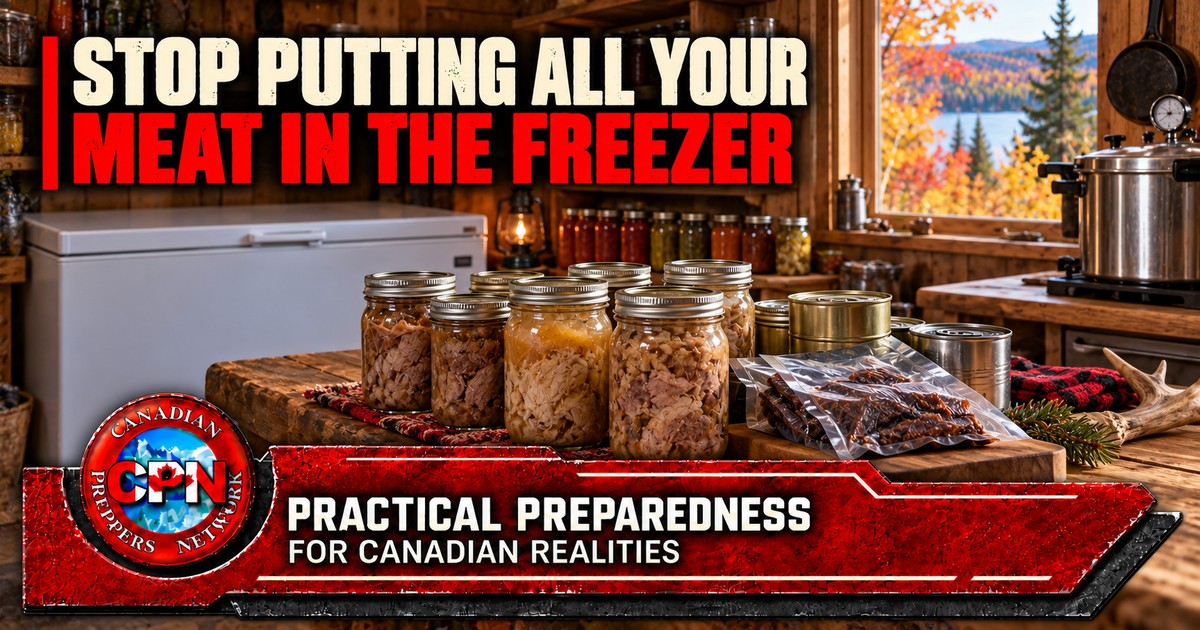
A stronger meat preservation plan divides your reserve between methods with different weaknesses. Keep selected cuts frozen. Build a working supply of pressure-canned meat. Use properly prepared dried meat for appropriate shorter-term needs. Include commercially canned products that your household actually eats.
That gives you choices when one part of the system fails.
Table of Contents
Two Freezers Can Still Share One Weakness
A second freezer adds capacity and offers some protection against an appliance failure. However, both may depend on the same electrical supply, generator and fuel cans.
Putting half your meat in each does little to address that shared dependency.
For meat preservation planning, ask a different question: How much meat could your household still use if you could no longer keep anything frozen?
If the answer is “whatever we can cook before it spoils,” the reserve needs another layer.
This matters particularly after a successful hunt or a large livestock purchase. Those events concentrate a considerable amount of food, money and labour in one place. Preservation decisions belong in the plan before the meat arrives.
Give Each Meat Preservation Method a Job
A practical meat preservation system gives each method a specific job. Assign each part of the reserve a purpose.
| Method | Best role | Main limitation |
|---|---|---|
| Frozen meat | Steaks, chops, roasts and other cuts you want to cook fresh. | Requires continuing cold storage. |
| Pressure-canned meat | Convenient meal portions stored without refrigeration until opened. | Requires correct processing, suitable equipment and protected storage. |
| Properly prepared jerky | Portable food and a smaller rotating supply. | Homemade storage life is limited and depends on preparation and conditions. |
| Commercially canned meat | An immediately usable pantry reserve. | Cost, product quality and household preferences. |
The useful balance depends on how you eat, what equipment you own and how much work you can realistically complete.
A household that regularly uses canned chicken in rice dishes has a practical reason to preserve more chicken that way. Someone who dislikes canned meat should experiment with a small batch before committing a substantial portion of the harvest.
Preserved food earns its place when it becomes meals your household will eat.
Keep the Cuts Worth Keeping Frozen
There is little reason to turn every carefully trimmed steak into canned meat simply to prove that you can.
Use freezing deliberately within your meat preservation plan. Keep the cuts whose texture and cooking qualities matter most to you. Package them in sensible meal portions, label them clearly and rotate them.
Vacuum sealing can improve packaging, but it does not remove the need to keep raw meat cold. A vacuum-packed roast remains perishable. Likewise, pulling a vacuum on a jar of moist meat does not make it safe for pantry storage.
Vacuum-sealer manufacturer Avid Armor explains the distinction in its guide to vacuum sealing versus canning: removing air does not replace the heat processing required for shelf-stable moist foods.
This makes a vacuum sealer a useful supporting tool. Its job is packaging, portioning and protecting food within an appropriate storage system.
Build a Shelf of Meat That Is Already Cooked
Pressure canning adds convenient meal ingredients to your meat preservation system.
There is no thawing stage. A suitable portion can become the foundation of a meal: chicken with rice, beef with potatoes, or game meat added to a sauce after opening.
Plain meat also gives you flexibility. Instead of preserving every jar as one heavily seasoned dish, you can choose a tested plain-meat recipe and season it for the meal when you use it.
However, meat is a low-acid food. Bernardin’s home-canning guidance identifies pressure canning as the required method for meat and other low-acid foods. A boiling-water bath is unsuitable.
Use the complete, current tested recipe for the specific food and preparation. Follow its jar size, packing method, headspace, processing time and altitude-adjusted pressure. Follow the canner’s operating instructions as well.
A pressure cooker or electric multicooker is not automatically a suitable pressure canner. Confirm that the equipment is intended for the tested canning process you plan to use.
Do not borrow a processing time from a different meat recipe or invent a thick stew and assume that processing it longer solves the uncertainty.
For a first attempt, choose one straightforward tested recipe and make a manageable batch. Learn the equipment while electricity, replacement supplies and an ordinary supper are still available.
Preserve Before You Have an Emergency
There is an enormous difference between calmly canning suitable meat on a Saturday and trying to empty a thawing freezer during a widespread outage.
Emergency processing demands equipment, water, fuel, clean working space and attention precisely when other problems may be competing for all five.
The quantity matters, too. A canner processes a limited batch. Preparing the meat, loading jars, venting, processing and allowing the equipment to cool safely all take time. A freezer full of meat can represent several runs.
Your emergency preservation capacity is the amount you can safely process with the resources available—not the amount of meat you hope to save.
Build the shelf reserve gradually as part of your meat preservation routine. When buying meat in quantity, decide in advance which portion will be frozen and which will be processed promptly using a tested method.
Canning cannot rescue spoiled meat. If storage conditions become uncertain, preservation is no substitute for a sound food-safety decision.
Give Jerky a Smaller, Specific Role
Jerky is useful because it is portable and convenient. It suits a field lunch, a work party or a rotating supply for travel.
That does not make every homemade batch a long-term emergency ration.
Safe preparation requires a validated meat-specific process. Drying meat until it looks leathery is insufficient, and a dehydrator’s temperature setting alone does not establish that the meat received an adequate safety treatment.
Use a tested recipe that specifies the necessary heating and drying steps. Treat its storage directions as part of the recipe.
Presto’s dehydrator instructions describe limited room-temperature storage for properly prepared homemade jerky and recommend refrigeration or freezing for better quality. Avoid treating homemade jerky like an unopened commercial survival product.
Within your meat preservation plan, keep jerky as a modest supply you consume and replace regularly. Pressure-canned and commercially canned meat can carry the main role of providing pantry meal ingredients.
Buy Some Resilience While You Learn
You do not have to wait until you own a pressure canner to reduce dependence on the freezer.
Commercially canned chicken, beef, ham and other suitable products can establish an immediate reserve. Start with products your household has tried.
Pay attention to package size. Once opened, leftovers generally need refrigeration according to the product’s directions. During an outage, a smaller container that supplies one meal can be more practical than a large economical tin that creates a storage problem.
Apply the same reasoning when choosing jar sizes for home canning, staying within the sizes permitted by the tested recipe.
The goal is to open what you can use.
Protect the Pantry From Canadian Winter
Successful meat preservation includes protecting the finished food: moving meat out of the freezer does not mean it can be stored anywhere.
An unheated garage, shed or seasonal cabin may expose jars and cans to freezing. A damp basement creates another set of problems. Shelving needs to support the weight and protect containers from falls, damage and pests.
Choose a suitable indoor storage area and follow the preservation guidance or commercial label for storage conditions. Keep dates visible and put older stock where it will be used first.
At a retreat, also consider what happens when the building sits empty. A pantry that depends on the cabin remaining heated still has an energy dependency.
Resolve that before leaving a winter’s food behind.
A Worked Meat Preservation Plan for a Bulk Purchase
Imagine bringing home 20 kilograms of suitable, properly chilled meat. Putting all of it into the freezer is simple, but it leaves the whole purchase dependent on refrigeration. Before shopping, decide which meals each portion will eventually supply and how much processing you can finish while keeping the rest properly chilled.
An illustrative allocation might reserve 12 kilograms for freezing, set aside 6 kilograms for a tested pressure-canning recipe, and use 2 kilograms for a tested jerky recipe. Those figures describe the meat allocated before processing. They do not predict the number of finished jars, the weight of dried jerky or a recommended nutritional balance.
Your cuts may call for a different allocation. You may prefer more frozen roasts, already have enough jerky, or discover that your canner and available working time make a smaller first batch sensible. Use the example to make the decision before the kitchen fills with meat.
The improvement is easy to see: some of the purchase will become pantry food instead of joining an entirely frozen reserve. You can repeat the exercise with later purchases until the household has a useful shelf supply. Keep the initial batches small enough to learn from without risking a large quantity.
Now give the finished food a meal plan. One jar might supply the meat for a household rice dish; another might be used with potatoes and vegetables. The actual portions depend on your household, recipe and appetite. Write down what worked after cooking the meal rather than assuming every jar represents the same amount of food.
Keep a simple record of purchase weight, preservation method, processing date and meals prepared. Record the recipe source and any processing details the recipe requires you to track. That makes the next meat preservation session easier to plan and helps you identify which products are being used steadily.
Finally, check the support supplies before repeating the batch. Count compatible lids and suitable jars, inspect packaging stock, and check the canner according to its manual. Confirm that the intended storage shelves have room. Running short of an essential item halfway through the job can turn an orderly processing day into a refrigeration problem.
This is also where shared household skills matter. Another responsible adult should know where the tested recipes are kept, which food belongs in the freezer, and how the dated pantry stock is rotated. A useful meat preservation plan should remain understandable when its usual organiser is unavailable.
Make the First Change This Week
Audit your meat preservation plan by counting meals rather than packages.
List the meat meals your household could prepare from the pantry without opening a freezer. Then identify a realistic first target—perhaps one week of familiar suppers.
Build towards it through a combination of purchased canned meat and home preservation you can perform correctly. Cook with that food during normal weeks so you learn portion sizes, preferred recipes and replacement needs.
Equipment should support that plan:
- A pressure canner suited to your stove and intended batch sizes.
- A vacuum sealer for freezer portions and other appropriate packaging.
- A temperature-controlled dehydrator for tested drying recipes.
- Reliable thermometers for food preparation and freezer monitoring.
- Suitable jars, lids and handling tools for the tested canning recipes you use.
Buy for the amount of food you will actually process. A large machine that stays in its box contributes less than a smaller setup you know how to operate.
A full freezer remains an asset. Strengthen it with a pantry reserve that lets you choose when to run the generator, when to use frozen food and when to leave the lid closed.
If your freezer stopped working tonight, how many complete meat-based meals would still be available on your shelves?
Related Reading
- Food Procurement & Storage in Canada — connect preservation with production, storage and resupply.
- Your Generator Shouldn’t Run All Night — organise refrigeration and charging around measured conditions and available fuel.
- Food Storage Supplies Buying Guide — compare the equipment supporting a practical working pantry.