

Guide to DIY wicking beds
http://permaculture.org.au/2011/06/20/from-the-bottom-up-a-diy-guide-to-wicking-beds/
Russell Coight....outback legend
Just came across wicking beds on a visit to an aquaponics supplier, very interesting so I decided to make one.

I had previously bought three worm farms from ALDI. I like recycling my food scraps but I don't like digging through wet muck fishing out worms when it comes time to collect the compost.
The options are to spread the compost out, wait until it heats up or dries out forcing the worms to go down deeper and then scrape off the top layer and repeat, or you can just dump the whole lot onto the garden but it does seem like a waste of worms!
Anyway my new system is to build a raised bed of bricks, two bricks high surrounding three of my worm trays. The worm trays are not stacked up one on top of the other as usual, instead they are placed side by side. This allows the worms to pass between the trays side to side by traveling down one tray, across the shared brick enclosure which is full of old worm compost and up into another tray. My idea is that I will feed at one end until it is full, add an extra tray on top as usual until that tray is full too. Then put food scraps in the tray at the other end to attract the worms out of the completed trays, which I can then harvest for compost without having to seperate out hundreds of worms.
It seems to be working but it is still early days yet.
This did leave me with the left over bits of the worm farm kit, namely the legs, the tap and the "Worm tea" collecting tray which usually goes on the bottom. Having just seen the wicking bed I decided to turn the bottom tray into one.
The tray is designed to hold worm tea so it is waterproof anyway. It has a tap a few centimetres off the base of the tray to drain the worm tea. I installed the tap upside down so the spout is pointing upwards. It is a nice watertight seal and the spout opening makes a nice watering hole, it also raises the level of water in the tray by a few centimetres as well. I spread a layer of gravel 5cm or so on the base of the tray, put some old flyscreen over the top and then added some compost/soil, some worm compost including the worms, some dynamic lifter, some wood ash, some more compost/soil, basel plants and sugar cane mulch on top.
I watered the basel in from above and all the excess water flowed up out of the spout and collected in a bucket under the tap, it wasnt that dirty. I guess if it rains hard the crop will not be flooded for long. You can see the height of the water in the wicking bed by looking down the spout and seeing the level. If you can't see the level you need to water it!
Hopefully the sugar cane mulch will prevent the water evaporating off the surface of the bed and by not watering from above I should save a fair amount of water as well, I just need to get a funnel for the spout as my aim is not as good as it used to be.
I must try and remember to take some pictures to upload.
What you don't know can't hurt you 🙂
I made some self watering planters from plastic 45 gal barrels. I'm a big believer now in a constant moisture state for the plants. Things in the planters did much better than in the ground, much better soil and constant water availability.
Cutting the barrel and putting the top into the bottom half (measure and experiment). I went for about 10-15 gals of water reservoir.
Under the soil, just as in a regular pot, you need gravel for drainage. I used styrofoam packing bits to save weight, landscape cloth liner to keep the soil where it belongs and cut up a "wicking mat" used for seed starting. I'm sure many other things could be used like those microfiber cloths.
Put a about 6 inches of soil in, spread the "wicks" around and fill to the top.
The big advantage for us in Northern climes is they're just big enough that you can drag them around, and indoors on those first few frosts. Not shown are the rope handles I put in.


Nice work!
How stable is the plastic in UV? I know in Australia they would need painting!
I would probably paint them anyway to stop sunlight penetrating into the water reservoir, do you have any problem with algae growth at all?
The pipe on the right, is that a water depth gauge with some floating polystyrene poking up out of it? I like that idea!
I can see you have some drainage holes in the top planter, does the planter ever flood during heavy rain?
What you don't know can't hurt you 🙂
Nice work Perfesser 😀
Russell Coight....outback legend
I've had this stuff (not just this one) sitting outside for years, sun does not seem to have degraded it any but we don't get the kind of intensity you do. Most barrels are blue or black but I just happened to get a white one from work that time. It had Spray Nine in it, a biodegradable degreaser. I wouldn't use a white one for water storage though, I could see algae being a problem there.
Yeah, sorry forgot to mention the water depth gauge. I had the pipe hanging around anyway so I cut a length of styro and dropped it in. Later models have no depth gauge but it is easier if you have one. Otherwise you look down the fill pipe to see if there's water there. Or you wait till everything is wilting and - oh shit- fill it up. I guess you could do the styro in the fill pipe too. Just pull it out when you fill and put it back in.
You never want the soil to be sitting in water, there's a hole drilled for overflow. We get some good thunderstorms in the summer, without an overflow the thing would become a soggy mess. Algae hasn't been a problem no.
Let's see if I can get this to work...
A picture of the completed worm farm, worms can move between the trays, hopefully making harvesting the compost easier.

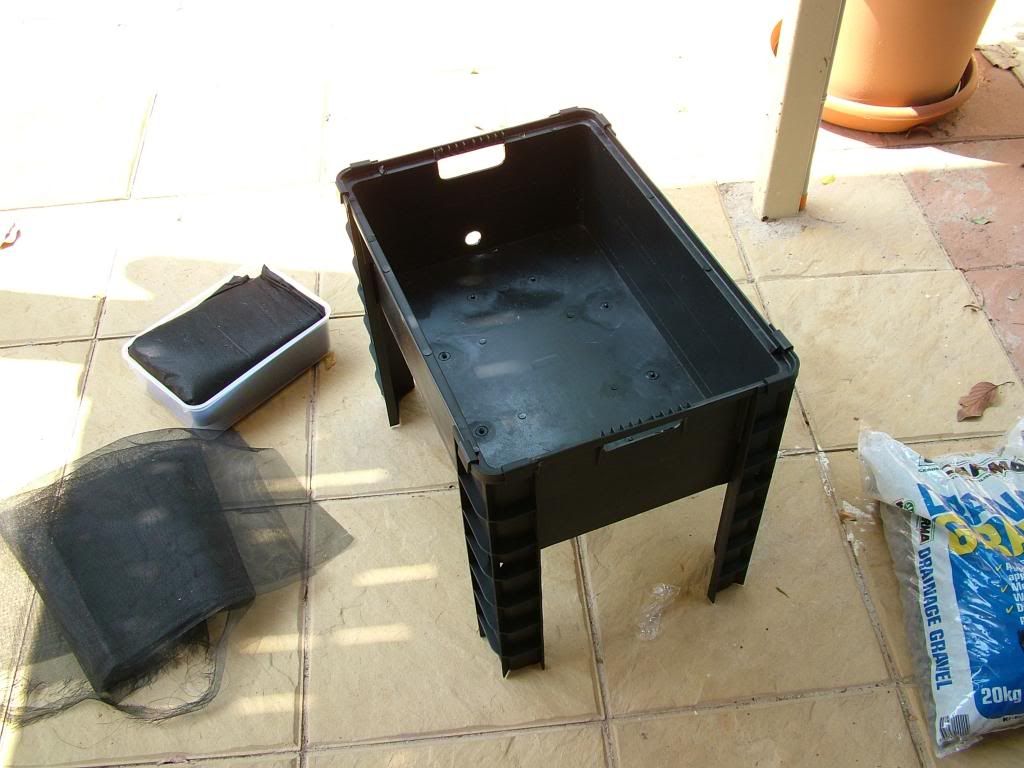
The spare parts...

Assembled...
Prepare site, easier to do this when it is empty! Has to be level in all directions...

A thick layer of drainage gravel, 10cm or so...

Some permeable weed control matting, tucked down around the gravel...

Some left over flyscreen, might help give the weed matting some support, not sure weed matting is meant to be permanently wet...

A few pellets of 'Dynamic Lifter', best to bury that stuff, smells bad!
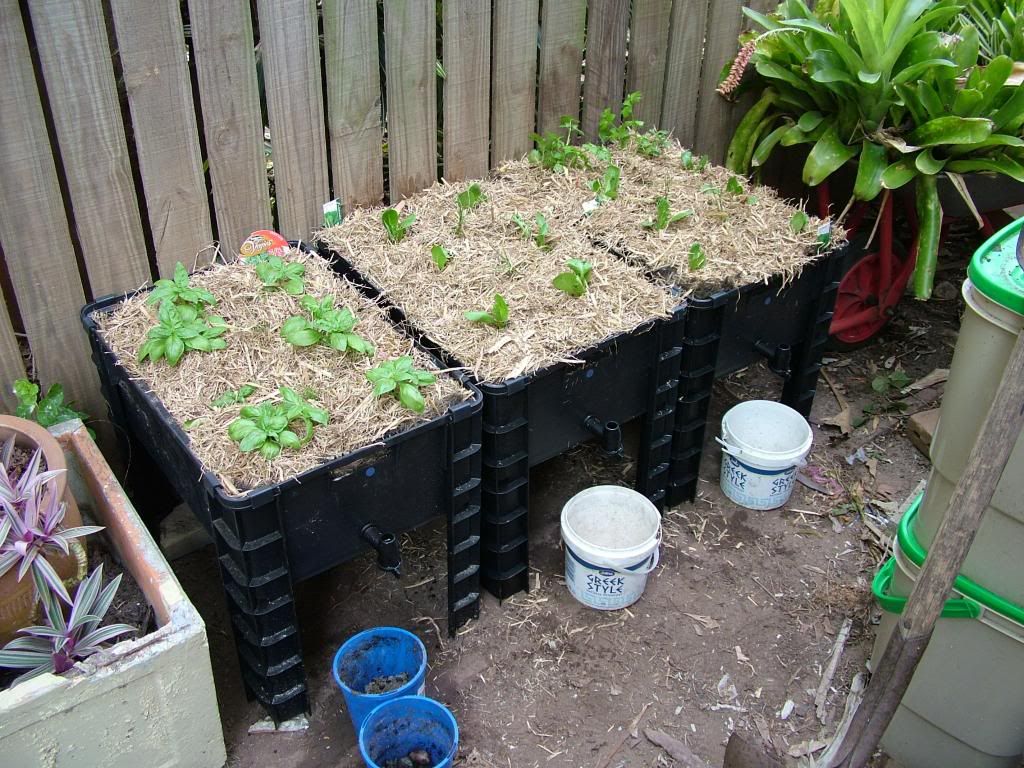
Planted...
Close up of the filler hole/water level viewer/overflow...

It rained pretty hard overnight but at least the grow beds weren't flooded!
What you don't know can't hurt you 🙂