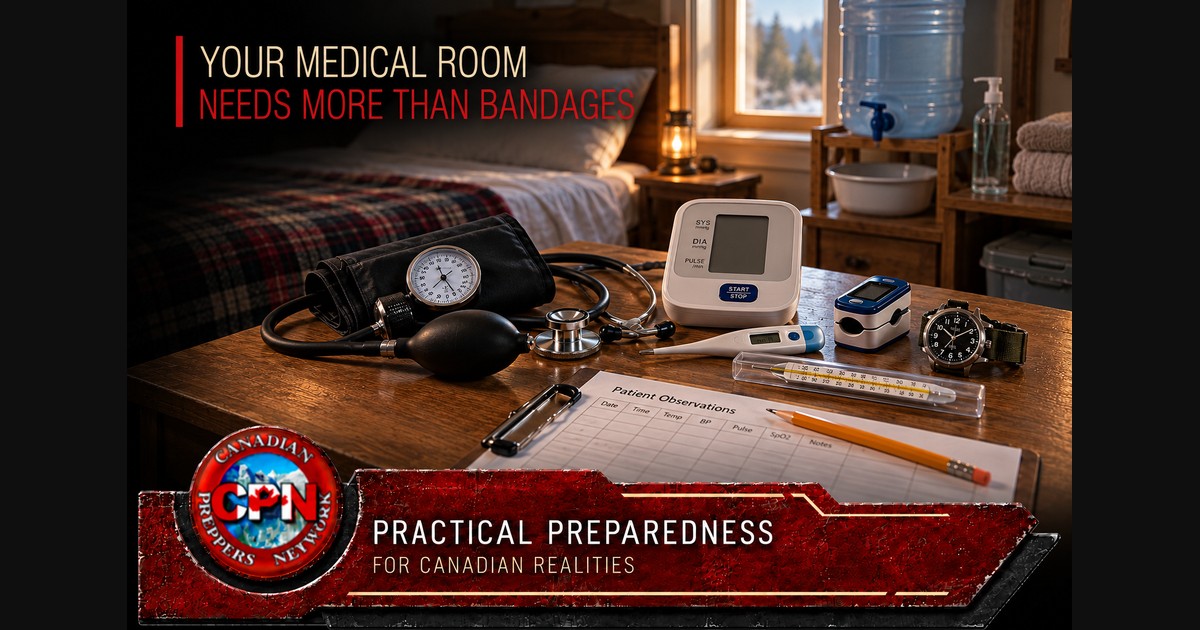
Equipping a home medical room for observation, sanitation and continuing care after the system fails.
The medical room is ready. There is a bed, spare bedding, a first-aid kit and somewhere to wash your hands.
Then someone becomes ill.
They feel hot, but how hot? Their breathing seems different, but has it become faster since the last check? The next caregiver arrives and asks what changed overnight. Nobody wrote it down.
A functioning medical room needs equipment for observation, basic care and sanitation. During a prolonged collapse, it also needs tools that remain useful when batteries, chargers and replacement parts become difficult to obtain.
Choosing medical room equipment does not require filling a spare bedroom with hospital machinery. It requires choosing dependable equipment, learning its limitations and supporting it with water, cleaning supplies, lighting and records.
A reading is useful when it is accurate, recorded and understood. An unfamiliar instrument can create confusion—or false confidence—at exactly the wrong time.
Table of Contents
Medical Room Blood-Pressure Equipment
A sphygmomanometer measures blood pressure. The two main household options are an automatic electronic monitor and a manual cuff with an aneroid dial gauge.
A validated automatic upper-arm monitor is a practical starting point. Choose a cuff that fits the intended user’s arm. A household caring for several people may need more than one compatible cuff size.
Choose medical room equipment with controls and a display that caregivers can use easily. A monitor that works independently of a phone, app or internet connection is better suited to prolonged disruption.
Bring it to a routine medical appointment so someone can check your technique and compare readings with the equipment used there. The American Heart Association’s home-monitoring guidance explains device selection and cuff fit.
For routine seated measurements, technique matters. Rest quietly beforehand, support the back and arm, keep feet flat on the floor and avoid talking during the reading. Follow the device instructions and the monitoring plan provided by the person’s clinician. Hypertension Canada explains the home measurement procedure.
A manual set provides a battery-free option. It includes a cuff, inflation bulb, pressure gauge and acoustic stethoscope. However, accurate manual measurement requires instruction, coordination and repeated practice. Buy it while there is still time to learn.
Manual does not mean maintenance-free. Inspect tubing for cracks, check the bulb and valve, protect the gauge from impacts and follow its calibration-check requirements. A needle resting at zero does not prove accuracy throughout the instrument’s range.
Give the Stethoscope a Defined Job
An acoustic stethoscope works without batteries and belongs with a manual blood-pressure set.
It also requires realistic expectations. Recognising and interpreting heart or lung sounds is a learned clinical skill. Owning a stethoscope does not provide that skill.
For a household caregiver, its first defined purpose may be assisting with manual blood-pressure measurement after suitable instruction. More advanced uses should follow the caregiver’s training.
Choose equipment that fits comfortably and allows the user to hear clearly. Keep its cleaning instructions with it, inspect the tubing and store it where it will not be crushed under heavier supplies.
Medical room equipment earns its place through the combination of a dependable instrument and instruction.
Keep Digital and Non-Digital Thermometers
A contact digital thermometer is compact, quick and easy to read. Keep a spare in the medical room, along with the correct replacement batteries.
Forehead and ear thermometers can be convenient, but each has a specific operating procedure. Learn the required positioning, measurement conditions and cleaning method. An infrared thermometer intended for engines or cooking surfaces is not a clinical thermometer.
For a battery-free option, consider a mercury-free glass clinical thermometer. Some use a gallium alloy instead of mercury. Keep its protective case and instructions, including how to reset the liquid column before use. Glass can break, so suitability depends on the patient and circumstances.
Record the measurement site—such as oral or underarm—alongside the temperature. Readings taken at different sites are not directly interchangeable, and guessing at a correction can introduce error. Mayo Clinic’s temperature-taking guidance explains the different methods.
Keep equipment intended for different uses clearly separated. A thermometer designated for rectal use should never return to oral use.
Before an emergency, make sure both the primary and relief caregivers can operate the thermometer, read it accurately and clean it correctly.
Understand the Pulse Oximeter
A fingertip pulse oximeter estimates blood-oxygen saturation and usually displays pulse rate.
It can add useful information to observations, particularly when someone has an established monitoring plan. It also has limitations.
Cold skin, poor circulation, movement, nail products and skin pigmentation can affect accuracy. Readings must be considered alongside symptoms and the person’s overall condition. A reassuring display must never override obvious breathing difficulty or deterioration. The American Lung Association explains these limitations.
Practise obtaining readings according to the instructions. Keep spare batteries with the medical room equipment and learn what the device displays when it cannot obtain a dependable signal.
There is no simple mechanical substitute that provides the same oxygen-saturation measurement. Counting breaths and observing breathing effort remain useful, but they do not measure blood oxygen.
A pulse oximeter also does not supply oxygen. Oxygen cylinders and concentrators introduce separate medical, operating and safety requirements.
Equip the Caregiver to Observe Without a Screen
A wind-up watch or mechanical timer displaying seconds can support manual pulse and breathing counts. A quartz watch is another option, although it still needs a battery.
Keep a clipboard, pencils, printed observation sheets and a folder containing relevant medical information in the medical room.
The log should record the time, symptoms, measurements, food and fluid intake, medications given according to existing directions, and the caregiver’s name. Include measurement details that help explain a reading, such as the thermometer method or difficulty obtaining a stable oximeter signal.
Paper records make handovers easier. The incoming caregiver can see what happened without relying on the memory of someone who has been awake most of the night.
CPN Gold members also have access to medical forms that can help with recordkeeping. Print copies and keep them with your medical-room supplies, ready to use when needed.
Ask a clinician beforehand what monitoring and action limits are appropriate for household members with existing conditions. Do not change prescribed treatment based on an isolated reading.
Build a Handwashing Station That Works Without Plumbing
A medical room consumes water throughout the day.
A gravity-fed container with a tap, secured above a wastewater basin, provides a practical handwashing arrangement when the pump stops. Test its position and flow before relying on it. The caregiver should be able to use it without balancing a heavy jug over a crowded bedside table.
Add soap, clean towels or disposable paper towels, and a defined route for removing wastewater.
Keep drinking water, food and clean medical supplies outside the splash area. Label containers by purpose so a basin used for washing cannot be mistaken for a drinking-water container.
Alcohol-based hand sanitiser can supplement the station, but retain the ability to wash with soap and water, especially when hands are visibly dirty.
Stock the medical room with examination gloves in sizes the caregivers can use. Include appropriate masks and eye protection for tasks where exposure or splashing is possible. Gloves require correct removal and hand cleaning; they do not make contaminated hands or surfaces harmless.
Separate Cleaning From Disinfection
Stock the medical room with detergent, suitable surface disinfectant, dedicated cleaning cloths and clearly labelled containers.
Cleaning removes dirt and other material. Disinfection is a separate process requiring a suitable product and correct use.
Remove visible soil first. Then follow the disinfectant label, including the time the surface must remain wet. A quick wipe followed immediately by drying may not complete the required process.
Check disinfectant compatibility with every piece of medical room equipment. A blood-pressure cuff, thermometer probe, stethoscope and electronic sensor may need different cleaning methods. Follow both the equipment instructions and the disinfectant label.
Keep any required measuring container with the cleaning supplies, clearly marked for that purpose. Never use food or medication measuring equipment for cleaning chemicals, and never mix cleaning products.
Avoid treating a household cleaning setup as a sterilisation system. Boiling water, a pressure cooker or a small ultraviolet gadget should not be assumed to make equipment suitable for invasive medical procedures.
The practical household priority is dependable cleaning and disinfection of equipment used within the caregiver’s training.
Equip the Bedside for Ordinary Care
Some of the most useful equipment has no display or power switch:
- Waterproof mattress protection and spare washable bedding.
- Separate wash and emesis basins.
- A urinal, bedpan or bedside commode where needed.
- A lined, covered waste bin.
- A separate laundry container.
- A washable tray or bedside table.
- A hand bell to summon a caregiver.
Choose a commode with an appropriate weight rating and stable placement. Plan how its contents will be removed and how the equipment will be cleaned.
Keep enough bedding to complete a change while another set is being washed and dried. Store clean items away from used laundry, waste and cleaning chemicals.
For the wider arrangement of the room, see Build a Collapse-Era Sick Room.
Support the Equipment With Light, Power and Spares
Medical room lighting must let a caregiver read a glass thermometer, inspect tubing and complete records.
Provide an adjustable battery-powered task light and a headlamp that leaves both hands free. Test them after dark, including whether their placement creates glare on instrument displays.
Make a medical room equipment inventory showing battery types, replacement parts and consumables. Include thermometer probe covers where required, compatible cuffs and any other items needed to keep the chosen devices usable.
Store medical room supplies within their labelled temperature limits. An unheated Canadian cabin or a vehicle parked through winter may be unsuitable for equipment, batteries and liquids.
Keep printed medical room equipment manuals together. A device that only becomes understandable after watching an online tutorial is an unfinished preparedness task.
Practise Before the Room Is Needed
Run a simple medical room exercise while everyone is healthy.
Take a temperature. Practise blood-pressure measurement with qualified instruction. Obtain an oximeter reading according to its manual. Wash hands using stored water, clean the equipment and hand a completed observation sheet to another caregiver.
Check whether each caregiver can actually use the medical room equipment under difficult conditions. Can they read the scale while wearing their glasses, operate a small valve with cold hands, and find the correct cuff without emptying a storage box? Put the printed instructions and accessories beside the instrument. Rearrange the setup after the drill so the next person can use it without a lengthy explanation.
Then repeat the medical room exercise without household electricity. Identify what still works, what needs batteries and what becomes difficult in poor light.
Severe breathing difficulty, new confusion, persistent chest pain, uncontrolled bleeding or rapid deterioration require urgent professional help whenever it is reachable. Equipment readings should support that decision, never delay it.
A useful medical room combines reliable instruments, trained hands, sanitation and records. Build those capabilities while there is still time to practise, correct mistakes and obtain the missing parts.
Related Reading
- Build a Collapse-Era Sick Room — plan the room, caregiving routines and separation of clean supplies from waste.
- Your First-Aid Kit Runs Out First — examine the consumables needed for continuing care.
- Medical & First Aid in Canada — connect training, equipment and household medical planning.
Medical-Room Equipment: Build Around the Care You Can Provide
Affiliate disclosure: As an Amazon Associate, Canadian Preppers Network earns from qualifying purchases. CPN is also a VEVOR affiliate and may earn a commission from qualifying purchases through the VEVOR links below.
The Amazon links open searches for the equipment categories discussed above. Check the exact model, intended medical use, cuff size, instructions and replacement supplies before buying. Search results are not a list of clinically validated devices.
Monitoring Equipment and Non-Digital Options
- Upper-arm blood-pressure monitors — choose a validated model with a correctly sized cuff.
- Manual sphygmomanometer and acoustic stethoscope sets — battery-free equipment requiring instruction, practice and maintenance.
- Digital clinical thermometers — compare measurement methods, cleaning requirements and replacement batteries.
- Mercury-free glass clinical thermometers — confirm that the listing is for a battery-free clinical instrument suitable for the intended user.
- Fingertip pulse oximeters — check intended use and instructions; account for the measurement limitations discussed above.
Sanitation and Bedside Support
- Water containers with taps — choose a stable setup for handwashing with a separate wastewater basin.
- Nitrile examination gloves — stock sizes suited to the caregivers.
- Bedside commodes — check stability, weight rating, cleaning access and usable dimensions.
- Waterproof mattress protectors — match the bed and retain the washing instructions.
- Hand bells — a simple battery-free way for a patient to call a nearby caregiver.
VEVOR: Non-Electric Bedside Equipment
- VEVOR adjustable bedside commode with a removable 5-litre bucket — a battery-free sanitation option. The manufacturer lists a 500 lb (227 kg) capacity. Check seat height, width, floor requirements and the cleaning instructions against the intended user and room.
- VEVOR white hydraulic overbed table, 31.5 × 15.7 inches — a manually adjusted bedside surface for a notebook, drinking cup and supplies needed for the current care task. It requires no electrical power. Check under-bed clearance and adjustment range, follow surface-cleaning instructions, and never use it as a standing or transfer support.
Keep clean supplies protected and separate from waste-handling equipment. Follow each product’s assembly, operating and cleaning instructions.
Start with the equipment and supplies your household can use correctly. Add training, printed instructions and replacement consumables before expanding the collection.
Sources and Equipment References
- Hypertension Canada: choosing a monitor and measuring blood pressure at home.
- American Heart Association: home blood-pressure monitoring.
- Mayo Clinic: manual blood-pressure equipment and measurement.
- Welch Allyn: blood-pressure gauge instructions, inspection and calibration checks (PDF).
- Mayo Clinic: taking a temperature.
- Geratherm: mercury-free clinical glass thermometer instructions (PDF).
- American Lung Association: pulse oximetry and its limitations.
- Clorox: example product instructions showing cleaning and wet-contact-time requirements (PDF; follow the label of the product actually used).