Whether you’re bugging out, lost in the woods, or caught in a sudden snowstorm during a backwoods scouting trip, knowing how to build an improvised shelter can be the difference between life and death. In Canada’s diverse and often harsh climates, mastering basic shelter-building is essential for every prepper, bushcrafter, or outdoorsperson.
🏕️ Why Shelter Is a Priority in Canadian Survival
In survival scenarios, the “Rule of Threes” applies:
- 3 minutes without air
- 3 hours without shelter
- 3 days without water
- 3 weeks without food
Given Canada’s unpredictable weather — from sudden snow squalls to cold rain and wind chills — shelter comes before food or even water. Hypothermia can kill quickly, even in temperatures just above freezing.
🪵 Key Principles of Shelter-Building
Before you start stacking branches, remember the core survival shelter principles:
- Insulation from the ground
- Protection from wind and precipitation
- Retaining body heat or fire heat
- Minimal energy use for construction
- Blending with the environment (if concealment is needed)
🛠️ Top Improvised Shelters for Canadian Terrain
1. Lean-To Shelter
Best for: Forested areas, short-term survival
Materials: Branches, logs, tarp (if available), leaves, pine boughs
How to build:
- Prop a long ridgepole between two trees or forked sticks.
- Lean branches at an angle against the ridgepole.
- Layer with evergreen boughs or a tarp for waterproofing.
- Add a bed of dry debris to insulate from the ground.
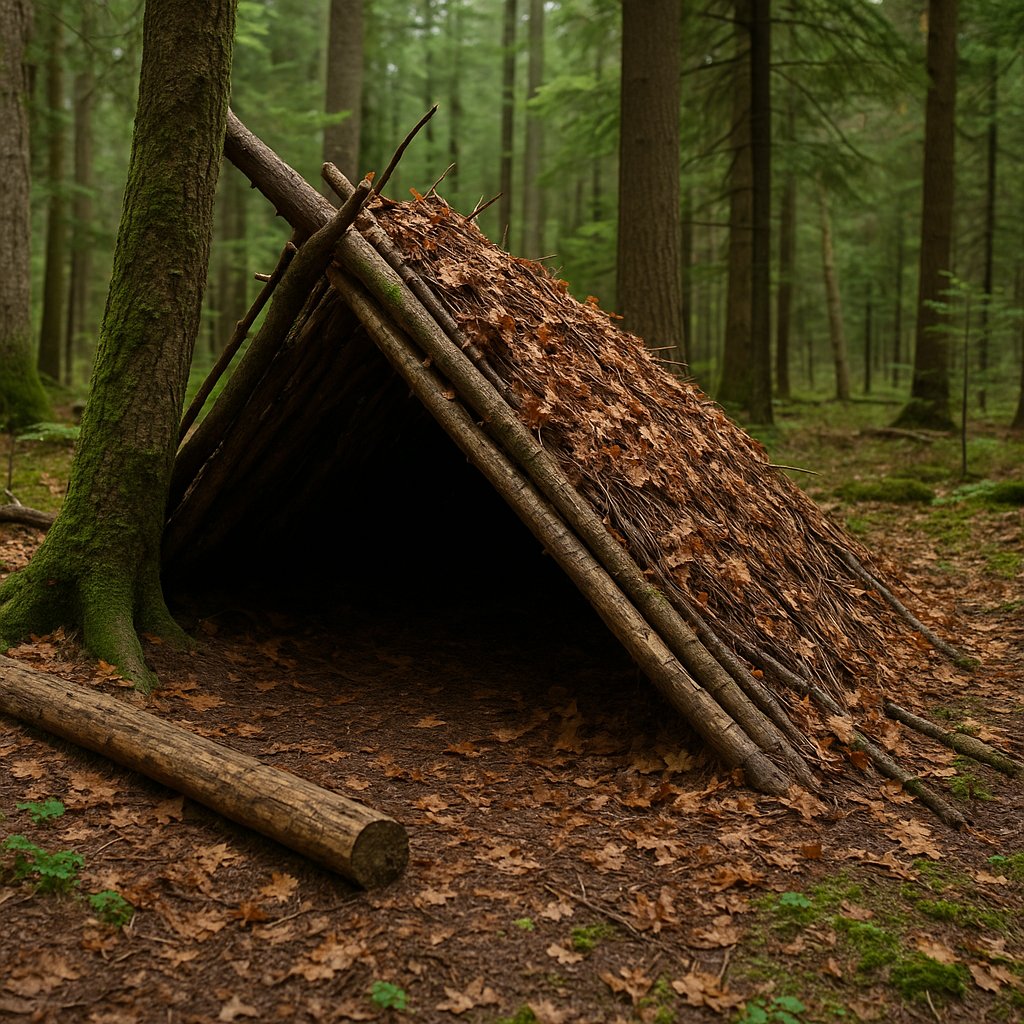
2. Debris Hut
Best for: Solo survival, cold nights
Materials: Branches, leaves, grass, pine needles
How to build:
- Create an A-frame with a main pole supported at waist height.
- Cover with ribs of smaller sticks, then pile on insulating debris (knee-deep).
- Crawl in and block the entrance with a bundle of debris to retain body heat.
3. Snow Cave / Quinzee
Best for: Winter survival, deep snow areas
Materials: Snow (1m+ depth)
How to build:
- Pile snow into a dome shape and let it settle (2–3 hrs).
- Hollow out the inside with a small shovel or hands.
- Add a vent hole and raised sleeping platform.
Warning: Watch for collapsing risk. Use a stick through the roof as a strength gauge.
4. Tarp Shelter
Best for: Quick setup, multi-day bug-outs
Materials: Tarp or poncho, cordage, stakes
How to build:
- Tie the tarp between trees or set it in an A-frame with stakes.
- Angle the back against the wind.
- Use logs or branches to weigh down the edges in strong weather.
5. Tree Root Cavity / Natural Formations
Best for: Emergencies, limited tools
Materials: Natural terrain features
How to use:
- Hollowed trees, rock overhangs, and root cavities offer fast cover.
- Improve with debris insulation and ground layering.
Tip: Always check for animal signs before crawling in!
🔥 Bonus: Heat Retention Tips
- Use reflector walls of logs or stones to bounce fire heat into your shelter.
- Place hot rocks near your bedding (wrapped in fabric or bark).
- Always insulate from the ground — cold soil steals heat rapidly.
🧭 Canadian-Specific Considerations
- Use conifer boughs (spruce, fir, pine) — they’re abundant, insulating, and water-resistant.
- Beware of moisture traps — the forest floor holds cold dampness.
- Wildlife: Don’t shelter near bear dens, beaver ponds, or fresh scat trails.
- Wind and direction: In winter, face shelter openings away from prevailing wind (often NW in most provinces).
🧠 Final Thoughts
Improvised survival shelters aren’t just a bushcraft hobby — they’re a real-world prepper skill with life-saving potential. Knowing how to build a warm, windproof hideaway from natural materials is essential if you’re ever caught off-grid in the wilds of Canada. Practice often, in different conditions, and always be prepared to adapt.
Because when the SHTF — shelter is survival.